
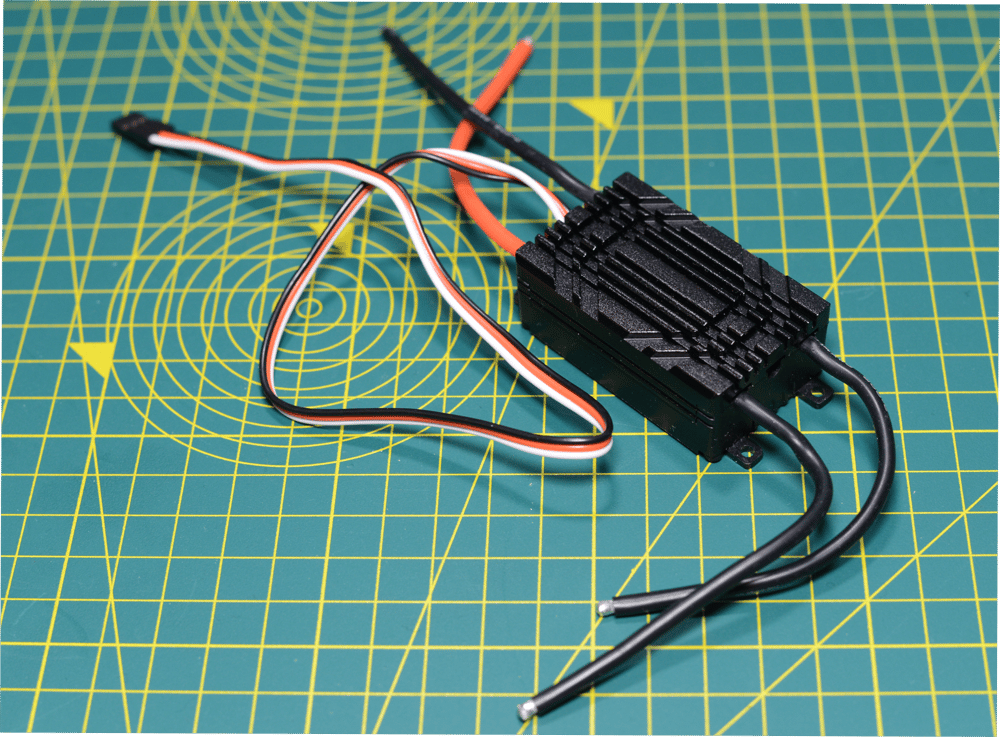
BTR50 50A 6S brushed ESC with current limiting
£55.00 Sold out
- Bidirectional control with regenerative braking and center brake - perfect for robot drive.
- User configurable current limiting from 10A to 80A in steps of 10A - the ESC controls the duty cycle to limit the maximum current to the motor. It can also be disabled.
- Thermal protection - if the ESC is overheating, it will reduce the current limit to lower its temperature. The original current limit is restored once the normal operating temperature is restored.
- 20kHz switching frequency - silent PWM
Specs:
Current rating for 3 minutes: 50A
Peak current for 30s: 80A
Max voltage: 6S / 26.1V
BEC: switch-mode 5V 1A (best to connect a single one to your receiver)
Dimensions: 65mm x 34mm x 21mm including the mounting tabs, 55mm x 34mm x 21mm for the main case
Weight: 73g
These should handle pretty much any featherweight drivetrain, including setups such as 775, 900 and 2x550 motors.
Current limiting
Almost all hobby ESCs lack current limiting or just implement thermal protection and call it current limiting. In contrast, these ESCs are actively sampling the current and updating the duty cycle 10,000 times per second, allowing them to safely drive larger motors than similarly rated ESCs - for example they can handle a stalled EV Warrior motor, which at 200A stall current would quickly damage ESCs of this size without true current limiting. With the appropriate current limit, these ESCs can also prevent or delay damage to the stalled motor itself.
Compared to an ESC without current limiting, some setups can appear to accelerate more slowly from 0 speed. This is because without current limiting, brushed motors draw their full stall current when starting up, while these ESCs always apply the current limit (unless disabled). Furthermore, the rate of acceleration from 0 to full speed is limited to 0.08s (80ms) to reduce current peaks and improve the stability of the current limiting loop - this is a very short time it should be unnoticeable in typical drivetrain applications, but it may be noticeable if testing an unloaded motor.
You can disable current limiting (see Setting the current limit below), however for the best reliability for fighting robots this should be avoided if possible.
Also note that even if current limiting is disabled, if the ESC is overheating, then current limiting will be automatically enabled until the ESC cools down to a safe temperature.
Important note
These ESCs implement safe start - they won't arm up until they detect an RC input in the center position. This is so that your robot won't drive away if you turn it on with a misconfigured RC system. A consequence of that is that the ESC might not arm until it's been calibrated for a specific radio. Follow the calibration procedure below if this is the case.
RC Calibration
The video below shows the RC calibration procedure at the 3:39 timestamp. These ESCs implement an RC signal calibration procedure similar to the simonk firmware: to enter calibration mode, hold the radio stick mapped to the ESC's channel at the upper end of the range (see note below) and only then power on the ESC. If there is a motor connected to the ESC, you should hear 3 beeps. Then move the stick to the lower end of the range. You should then hear 1 beep. After that, you can release the stick to the center position - and you should hear 1 beep to indicate that the ESC is armed.
Setting the current limit
The default current limit is 80A. The video below shows the procedure for setting a current limit at the 10:21 timestamp. To enter the current limit setting mode, hold the radio stick mapped to the ESC's channel at the lower end of the range (see note below) and only then power on the ESC. You should initially hear 1 beep indicating that the ESC has booted up. Then the ESC will start producing sequences of beeps, from 1 up to 9 - these correspond to a current limit of 10A (1 beep) up to 80A (8 beeps) or no current limit (9 beeps). To select a current limit, move the radio stick to the upper end of the range during or immediately after a given sequence. The ESC will then stop producing any beeps until you move the stick to the center position - then you should hear 1 beep to indicate that the ESC is armed. Tip: it may be easier to keep a 1 to 9 count between each sequence of beeps rather than trying to count each beep in some of the longer sequences.
Note: by upper or lower end of the range we mean a logical high or low RC signal respectively. These may be shown as 100 and -100 by your radio. Depending on whether mixing is enabled, these may or may not correspond to the top and bottom positions of the physical radio stick used for driving. If you are struggling with calibration and setting the current limit, it may be easier to temporarily use the throttle channel with no mixing for setting up the ESC.
Safety warning
When using the calibration or current limit setting modes, it's possible to accidentally arm the ESC and cause the motor to run, for example due to an RC system misconfiguration. Therefore, before using these modes you must always ensure that the motor connected to the ESC can safely run without creating a safety hazard, for example by removing parts of the transmission system or by using a cradle to lift the wheels driven by the motor off the ground.
Shipping with Royal Mail Signed For 1st Class or Royal Mail Tracked 24 in the UK and Royal Mail International Tracked and/or Signed.